Below are "quick start" instructions for configuring Eudora.
If you prefer, we also have more detailed instructions for configuring Eudora.
1. Download and install Eudora
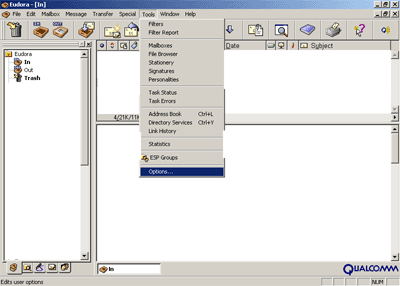
2. From the Menu bar select "tools" and then "options"

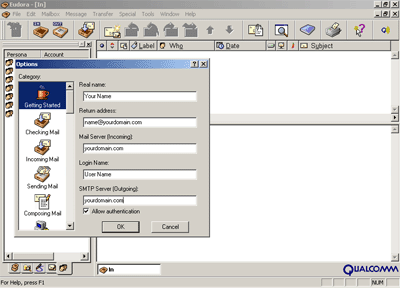
3. Select "getting started" in the options Menu

4. In "Real name", enter the name you would like to see when sending
e-mails
5) In "Return Address", enter the email address you wish to send
mail from: name@yourdomain.com
6) In "Mail Server (Incoming)", enter yourdomain.com
7) In "Login Name", enter the User name of your account
8) In "SMTP Server (Outgoing)", enter in yourdomain.com
9) Click OK
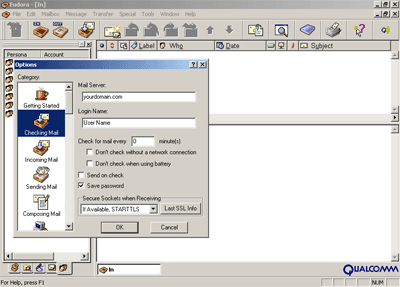
10) Click on the "checking Mail" tab.
11) Enter your domain name as the mail server and enter your username in the
login name section. You may also want to select the save password box.

Testing your e-mail:
Select "Check Mail" under the File menu.
Enter your password into the Password Window that pops up, then click on the
Proceed button.
Eudora will check to see if you have email.
You can now send a test email message to yourself and then check to see if
it gets returned to you. If you checked "Save Password", Eudora
will not prompt you again for your password after the first time.
Note: Your default email address is yourdomain@yourdomain.com This is where
all of your email will be sent to, unless other configurations take priority
(such as autoresponders and redirects).